Make sure you have a cup of tea and a snack for this post because I have a feeling it's going to be a long one. Before I even begin I am not in any way a photographer. I'm completely self taught and this is just what I've found best through trial and error for the type of photos I like to take. I'm still not completely happy with my photography and I think that it's one of those things you're continuously learning about and finding new ways to do things. In saying that I do think I've come a long way and I've found some good tips to share with you all.
I see photography as one of the most important elements of blogging. I know not everyone will agree with me on that one but I think a beautiful picture can really enhance your blog. I avoid using stock photos because aesthetically I think it's much more pleasing to see products beautifully photographed. That's just my personal preference.
EQUIPMENT
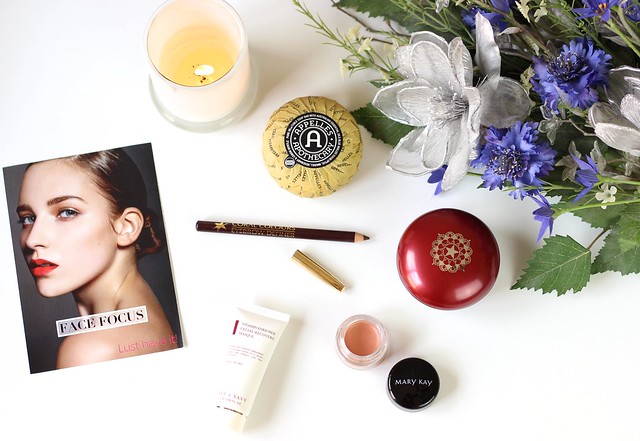
All my blog photos are taken with the Canon 600D that I invested in earlier in the year. Previous to having this I swapped between a point and shoot or my iPhone. The above photo was taken with my iPhone and then edited. My point is, you don't
need a DSLR to produce really beautiful photos but it is a lot easier, especially when you start learning the different settings. I didn't invest until a year after starting my blog, I think to begin with there are more important things to focus on like producing amazing content and just generally seeing if blogging is something you want to stick at.
I first started only using the kit lens which is nice and you definitely can work with it however I now have the Canon EF 50mm f/1.8 Lens that I adore. A good lens makes all the difference. It's fantastic for sharp, detailed images and will give you a lovely blurred background. I'm looking at investing in the 40mm f/2.8 STN Lens just because the 50mm lens is super zoomed and the compactness of the 40mm is appealing.
Other equipment I have include a tripod, remote and lights. If you're going to be taking self-portraits I'd recommend a tripod and remote - they both just make your life so much easier. I wouldn't bother investing in a high quality one tripod, I bought one off eBay and it does the job. The RC-6 remote will make your life so much easier when taking self portraits or if you're fashion blogger wanting to take outfit pictures. Again, I recommend eBay for that because I saved up to 70% off RRP. Crazy but true.
SETTINGS
Now I'm talk through the settings in an informal type way because that's how I understand it.
I always use the 'M' (manual) settings so that I have control. Honestly if you're using your DLSR on Auto then I don't understand why you bought a good camera. You'll always get the best picture possible when you use your camera on manual and manipulate the settings to suit. If you're not going to take the time to learn how to use it then don't bother buying it, save your money and buy a point and shoot.
The aperture 'F' number is important to look at when you're picking a lens. Essentially the lower the 'F' number, the sharper your image will be. For beauty bloggers I think it's what works best and gives you a lovely blurred background with products as the main focus. The 50mm has a low F number but you can also change this manually on your camera. I usually put aperture to F2.8 for most photos. If it's a single product I may lower it and if it's an aerial photo with multiple products I'll turn it up to make sure most of the products are in focus.
ISO is another thing that I
always change. This is your camera sensitivity to light. My unit is terribly lit so I need to ensure I'm altering this every time I'm shooting. I generally have it on 200 on a sunny day, 400 on an overcast day or 600 if it's really really dark. The most used setting is 400 and generally try to avoid taking photos if I can't shoot with my ISO on 400 because I prefer having some sort of natural light as a helping hand - just personal preference.
Smaller things is I change the camera to have the LCD view over having to look through the viewfinder. This makes altering the composition a lot easier and using the arrows you can move the white box around the screen, wherever you put the white box that's where the lens will focus. This is how I get sharp images when a product is off-centre.
As for manual vs auto focus this is changed by a flick of a switch on the lens. If I'm shooting products I focus the lens myself but if I'm taking self-potriats I always use the auto focus and ensure the white box is right on my face so I'm in focus. I know a lot of people only use auto focus, I don't think it changes the quality of your photos but I just find it easier when shooting products to adjust it manually.
LIGHTING
As I mentioned before I do have a set of light boxes I bought of eBay. I generally only use these to help boost the lighting because I like a really bright picture. I
always prefer natural lighting but, as I said, my unit is horribly lit so I don't have much choice. The downside to these is that they're so massive. If you're living in a small space I would recommend trying to work with the natural lighting. I pretty much have to use one of the set every time I'm taking photos because of the poor lighting.
As for flash, I don't like it and I don't recommend using it (there is so many resources online to help you use flash the right way if you NEED too). I find it just washes out the photos and doesn't represent true colours but again, personal preference and I know you can make it work if you need too.
COMPOSITION
This is a lot of trial and error. My unit is pretty small so I change my backgrounds up quite frequently not by choice but rather I chase natural light around my unit. I would suggest having a set place to take your photos with a few flowers or trinkets in the background so it's a bit more 'you'. Everyone has there own style of taking photos so it's nice to have your own way of doing things that your audience can identify that photo as yours. I like my photos to be clean and bright but there so many ways you can make someone identify your blog by your photos so have a think about your background and take note of other people's photos you like for inspiration.
When shooting I always ensure that I take a photos from different angles so I have a range to pick from during the editing process. I nearly always have a candle burning in most of my photos because it adds a little bit of warmth to my photos, fairy lights can also make a huge difference.
EDITING
I had a lot of questions asked about editing my photos but generally all I do is what I've done to the above photos - I crop it and turn the brightness up one or two clicks in iPhoto. I don't like doing too much to my photos. I would love to invest and learn Photoshop down the track but for now I'm wanting to work more on my composition rather then the editing side of things. Baby steps. If I'm adding text over an image I use
Picmonkey or
Canva.
Phew I'm puffed. I really hope that was useful - let me know if you have any questions. I'm more then happy to help anyone out as much as I can because I know how hard it can be to take a great photo.
Remember it's all about trial and error so have fun. I'm still learning too!